Sep 11, 2010

Sew and Show Saturday

A little bit of sewing for Miss Samantha today-
         Linen look cotton with cute floral trim, quite retro i think.


Sep 8, 2010

Elastic tutorials

Here are 2 quick alternatives to traditional cased elastic.


1- Fold over Elastic (FOE)

This wide elastic has a fold line down the middle that allows you to easily fold it over the raw edge of your fabric and sew it down making it a quick elastic edging.
Great Aussie suppliers of FOE- GBAU or Nappies covered


Take the length of elastic required by your pattern and shorten it by approx 1" as the stretch of FOE is a little different. Sew into a loop right sides together, you can snip the corners of your elastic if you like.
Mark your loop of elastic in quarters as well as your garment opening then pin the elastic to the opening at those marks. Lay your fabric onto the wrong side of the FOE to the center line then fold the FOE over encasing the raw edge of the fabric.
Set your machine to do a wide 3 step zig zag (the dotted zigzag line on your machine) if you dont have 3 step zigzag normal zigzag will be ok.
Sew carefully stretching your elastic to match the length of your fabric as you go, concentrate on one quarter at a time,  Be sure your fabric is right in the fold of the elastic, you should be catching the bottom layer of elastic, the fabric and the top layer of elastic.

Start and end at your join in the elastic.

2- Serged Elastic (false casing)
Attaching your elastic with your serger can be a quick and simple way of creating your casing.


Cut your elastic to the length indicated on your pattern, mark in quarters and also mark your garment opening in quarters, pin together at these marks. (be very aware of your pins as you surge DO NOT SEW OVER YOUR PINS).
Serge the elastic to the wrong side of your fabric taking care to not touch the elastic with the knife, pull your elastic gently to match the fabric at each pin mark.

On your sewing machine fold your edge over just the width of the elastic, sew a straight stitch just catching the very edge of your elastic as you sew, pulling the elastic flat as you sew.
There you have it false cased elastic with a lovely serged edge.

Removable Fairy wings singlet Tutorial

I was doing this tutorial for a friend so i figured i may as well share it with everyone.

You will need-
  • 2 pieces of tulle cut into ovals one slightly smaller than the other, i cut mine about 30cm long and about 20cm high (12" by 8") You can add more layers if you like
  • 1 singlet, onesie, t-shirt, what ever you would like to put the wings on really
  • approx 10cm of 2.5cm wide ribbon (4" of one" wide ribbon)
  • a 2.5x2.5cm (1"x1") piece of both hook and loop (touch tape, Velcro etc)
*Your ribbon and hook and loop don't need to be exactly these widths as long as they are both the same width or the ribbon is a little wider than the hook and loop.*

Lay the smaller piece of tulle on top of the larger one and mark the center at the top and bottom

set your machine to do a really long straight stitch and sew 1 line ether side of your center marking

Place a pin at the top and bottom of your stitching
At one end twist your thread tails around the pin securing them in place
at the other end get hold of the top thread on both sides and begin to push the tulle backwards towards your anchored threads, it will start to gather, keep sliding the tulle along the threads till it is about 1 1/2" wide through the middle.
Twist the tails at this end around the other pin to keep gathering in place
Now you can remove the pins and wrap your ribbon around the gathering (back is shown) fold the raw edge of the ribbon under to prevent fraying. Once pinned you can pull out your gathering threads gently by pulling one thread all the way out at a time.

Set your machine back to a normal length stitch (about 2.5) and sew your ribbon to your tulle, sew a rectangle around all edges to keep it nice and secure.
Sew the Hook (scratchy part) side to the back of your wings, another rectangle.

Then sew the Loop (soft part) to the center back of your singlet etc


Have I inspired you?
Post your photos in the Cuddles'n'chaos Flickr group 


Sep 6, 2010

And it begins again

Sadly winter has seen me gain back a few of the Kg lost earlier in the year.
So today is the first day back on detox, i am not looking forward to the next 3 days!
BUT
i am looking forward to finally loosing this last 20kg, wonder if i can do it by January? probably not but ill give it my best shot!

I follow the Body trim program which mainly consists of high protein, low carbs, regular eating and portion control along with easy daily exercise. i really do love it once i am back into the swing of it all.
I am hoping to get out and walk in the evenings again now the sun is up a little longer, cant wait till daylight savings changes over!


Sep 5, 2010

Baby Knot hat

here is a little freebie for you
I am working on creating some kids PDF clothing patterns at the moment, they will eventually be for sale in my ETSY store.
I thought i would share with you my Baby Knot Hat pattern I hope you get lots of use out of it, it is very cute.
Here is the Large with contrasting binding on Sammy who is 13 months old.
Cant keep her still for a decent photo.

Have i Inspired you?
Post your photos in the Cuddles'n'chaos Flickr group

Happy Faters day

I hope all the dads out in the land of Chaos are getting lots of cuddles today.
The kids and i had fun decorating brown paper for the wrapping of all the presents, shame we weren't a bit more organized and actually made something for the dads and pops :( next year ill think of something fantastic!

I think the kids favorite part of fathers day lunch was-

My newest most favorite thing!

I had a re design over at my invitation business Designed with love a few months ago, i finally got around to ordering matching packaging last week, thing is i wanted somewhere nice to keep it all.,
I conned hubby into helping me out and after a few hours we ended up with my newest most favorite thing!
everything looks so pretty on it and i havent lost my sticky tape yet :p

Aug 27, 2010

Gnocchi adventures

Each Thursday a small group of us get together for "mothers group" we have been trying to do a bit of an activity with the kids now they are getting a bit bigger and free play can get a bit boring for them.

This week everyone came to our house and we made Gnocchi, we also made our own butter to make the yummy sauce with!

the gnocchi recipe was really easy-

Gnocchi

serves 4 (we made a double batch)
  • 4 (750g) desiree potatoes, unpeeled;
  • 1  1 / 3 cups (200g) plain flour, plus a little extra;
  • Potato ricer or mouli;
  • Salt
1- Boil potatoes (unpeeled)  for approx 20-25 min, you want them par boiled not water logged.
2- once cooked let potatoes cool slightly, peel away the skin with your hands and press them through a potato ricer (i guess you could grate the potatoes), add a little salt (we skipped the salt)
3- Add flour to potatoes then use your hands to knead briefly until a soft dough forms. If mixture is still sticky, add a little more flour (the amount of flour added is crucial - too much flour will make the cooked gnocchi heavy and tough, while too little flour will cause gnocchi to disintegrate during cooking). Turn dough on to a lightly floured surface.
4- Cut dough into 4 equal-sized pieces. Using your hands, gently roll each piece out to form a log about 2cm wide. Using a lightly floured knife, cut each log into 1.5cm-long pieces.
5-Roll each ball of gnocchi over the tines of a lightly-floured fork, pressing gently with your index finger or thumb underneath as you go, to form a dent in the back of each one and fork marks on the other side (this creates a textured surface, helping sauces to cling to cooked gnocchi).
6- Bring a large saucepan of water to the boil. Add 1/4 of the gnocchi. As they cook, gnocchi will rise to the surface of the water. Continue cooking gnocchi at the surface for about 10 seconds then remove with a large slotted spoon and drain well. Repeat with remaining gnocchi. Serve immediately, tossed together with your favorite sauce.

original gnocchi recipe here

Our throw together sauce recipe
serves 8
  • 1 bunch of basil torn
  • small packet of pine nuts
  • approx 1 cup of fresh shelled peas (you could use frozen)
  • 3 tbsp of fresh butter
  • 1 cove of garlic crushed
  • 1 cup of grated Parmesan cheese
1- Lightly toast pine nuts in a dry pan then set aside
2- lightly blanch peas
3- Melt butter in pan and fry off garlic
4- add peas, pine nuts and torn basil to the garlic and butter and take off heat.
5- stir through your fresh cooked gnocchi along with 3/4 of your cheese
6- serve into bowls and garnish with the rest of your cheese.


Ricing the potatoes

Shelling the peas

Mixing, rolling and cutting the gnocchi

Carefully cooking in small batches

Delicious!


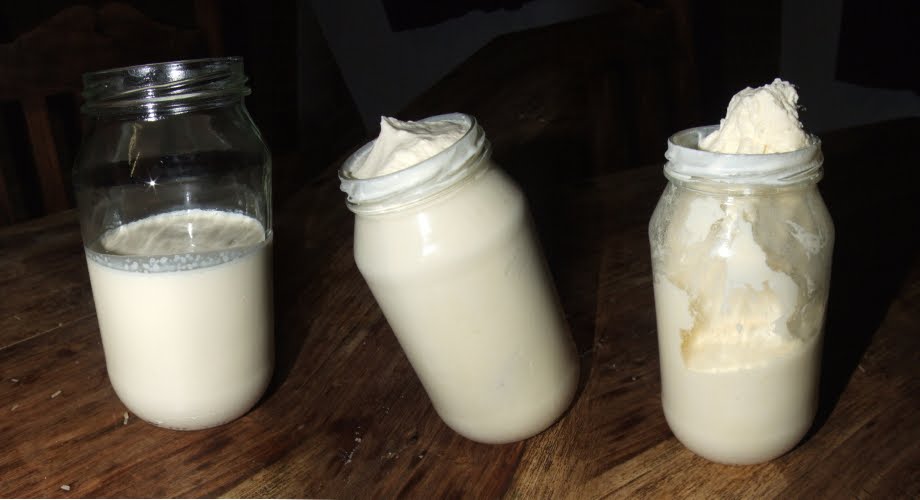
Making our own Butter

  • 1 clean glass jar with tight sealing lid
  • Fresh cream at room temperature
1- Fill the jar a little less than half way with cream, the less in the jar the faster the process. Any more than half way and there will not be enough room for the cream as it whips.
2- SHAKE SHAKE SHAKE SHAKE!!!!! 
your cream will begin to whip, keep shaking once it stops sloshing, soon it will begging to separate and will start to slosh around again but this time you will see a thin liquid (the butter milk) and some yellow solids forming.

keep shaking! once you have a lump of yellow butter floating in allot of butter milk you can strain off the milk (it is pretty much skimmed milk now so use it in cooking or drink it)
you can turn out your butter onto a wooden board and work it some more to get more milk out if you like.
you can also add some salt at this point if you wish.
You have now made butter, pop into a container, will keep up to a week in the fridge.


Make it Monday

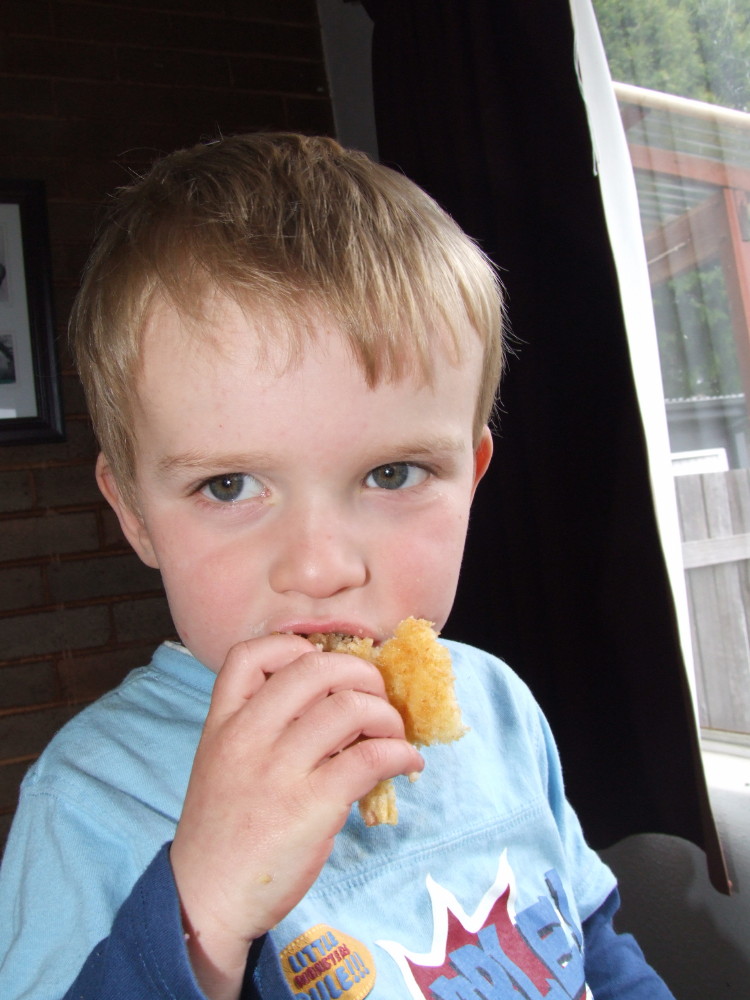
We tried out a yummy cheese and bacon muffin recipe this week.
Chris was ever so excited to help cook and couldn't wait for them to be ready to eat.
We had to make sure we saved a few for daddy, they where sooooo good we nearly ate them all!

Bacon and Cheese muffins


  • 1 3/4 cups all-purpose flour (we used 1 cup of white flour and 3/4cup of wholemeal)
  • 1 1/2 cup shredded cheese
  • 1 tablespoon brown sugar
  • 3 teaspoons baking powder
  • 1/4 teaspoon salt
  • 1/4 teaspoon paprika
  • 1 egg
  • 3/4 cup milk
  • 1/3 cup vegetable oil
  • 100g diced bacon
  • 1/2 teaspoon of crushed garlic

1- Cook bacon and garlic in frying pan
2- mix flour, cheese, sugar, baking powder, salt and paprika in a bowl
3- in a separate bowl mix egg, milk and oil
4- combine wet and dry ingredients
5- fold bacon into your mix
6- divide into a greased muffin tray, should make 12 small muffins
7- cook at 180c for approximately 20-25min


Jun 3, 2010

Website

I have been working away on a website for Cuddles'n'chaos, hopefully it will be ready soon.

There will be a few new products available once the site is up too :) i will keep you posted on details.